Key Takeaways
- Scale Matters Most: Wall art should span roughly two-thirds the total width of the furniture piece sitting directly beneath it to establish proper balance.
- Standard Hanging Height: Position artwork so its center line rests 57 to 60 inches from the floor, or 6 to 10 inches above furniture.
- Elevate Simple Materials: Common household supplies like pre-mixed joint compound, dried plant stems, fabric remnants, and 1×8 pine boards yield high-end designer aesthetics at a fraction of retail prices.
- The Oversized Mount Trick: Placing smaller artwork or prints inside an oversized mat board instantly provides visual breathing room and a gallery-worthy display.
- Master Color & Contrast: Beginners can avoid muddy acrylic paint mixtures by starting with a limited three-color palette of Titanium White, Ultramarine Blue, and Burnt Umber.
Transforming bare interior walls into a curated, magazine-worthy gallery does not require thousands of dollars or a degree in fine art. High-end wall decor often derives its luxury feel from intentional sizing, proper framing, and thoughtful material combinations rather than an expensive price tag. By mastering a few fundamental styling rules and hands-on crafting techniques, you can make custom DIY wall art that looks expensive while spending only a small fraction of boutique retail prices.
Whether you want to build a textured canvas with joint compound, press natural botanicals with a household iron, or master classical acrylic painting principles, this guide breaks down nine actionable, designer-approved projects. You will discover exact step-by-step instructions, material lists, hanging measurements, and Answer Engine Optimization (AEO) solutions to elevate every room in your home.
What Makes DIY Wall Art Look Expensive?
To make DIY wall art look expensive, you must focus on scale, proportion, framing consistency, and correct hanging height rather than total project cost. An inexpensive print or handmade craft looks custom and high-end when sized correctly to the surrounding room and furniture.
According to interior styling guides from Buy Wall Art, the single biggest mistake people make is choosing artwork that is too small for the space. Small pieces floating on a massive wall appear as an afterthought, whereas properly scaled art grounds the room and feels intentional.
| Furniture Type / Location | Average Furniture Width | Target Artwork Width (2/3 Scale) | Recommended Artwork Layout |
|---|---|---|---|
| Living Room Sofa | 72 – 84 inches | 48 – 56 inches | Single 30×40″ canvas or pair of 24×36″ framed prints |
| Console / Entry Table | 48 – 60 inches | 32 – 40 inches | Single 24×36″ framed print or 30×30″ square canvas |
| Queen Size Bed | 60 inches | 40 inches | Pair of 20×30″ frames or single horizontal 24×36″ |
1. The Two-Thirds (2/3) Scale Rule
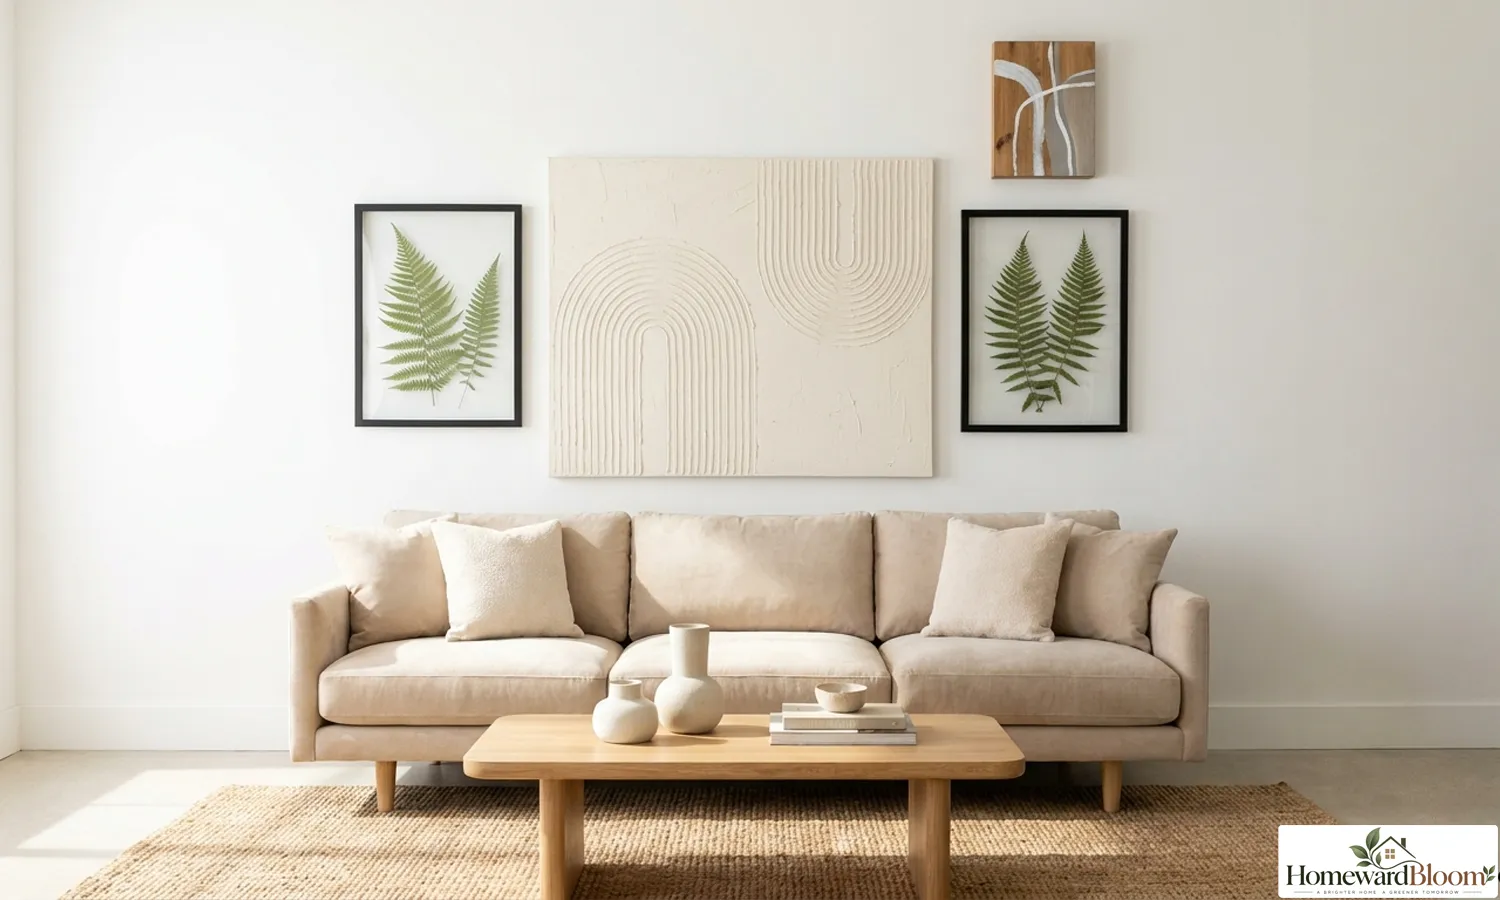
When positioning art over a sofa, bed, dresser, or console table, the total width of the artwork should span approximately two-thirds (2/3) the width of the furniture below it. For example:
- Over a Console Table or Queen Bed: A single 24×36-inch framed print or canvas provides excellent proportion.
- Over a Standard Living Room Sofa: Opt for a large 30×40-inch piece or a matching pair of 24×36-inch prints hung side by side.
2. The 57-to-60-Inch Hanging Height Rule
Museums and professional art galleries place artwork so that the center point of the piece sits exactly 57 to 60 inches from the floor. When hanging art directly above furniture like a couch or headboard, leave a 6 to 10-inch gap between the bottom of the frame and the top of the furniture to prevent the art from feeling disconnected or floating away.
3. The Oversized Mount Framing Hack
As highlighted by Sara Hesikova and Heather Young of Ideal Home, one of the most effective ways to make simple prints or postcards look extraordinarily expensive is by placing them in an oversized mat (mount). According to interior stylist Sienna Brooks, exaggerated white margin space around small artwork creates visual breathing room, drawing the viewer’s eye inward and making even a modest card feel like a masterpiece in the Royal Academy of Arts.
How Can You Make Textured Canvas Art with Joint Compound?
You can make high-end textured canvas art at home by spreading pre-mixed joint compound onto a primed canvas board and combing geometric patterns into the surface with a notched trowel. Once completely dry, sealing or painting the textured surface yields a dimensional, boutique-style painting for less than $30.
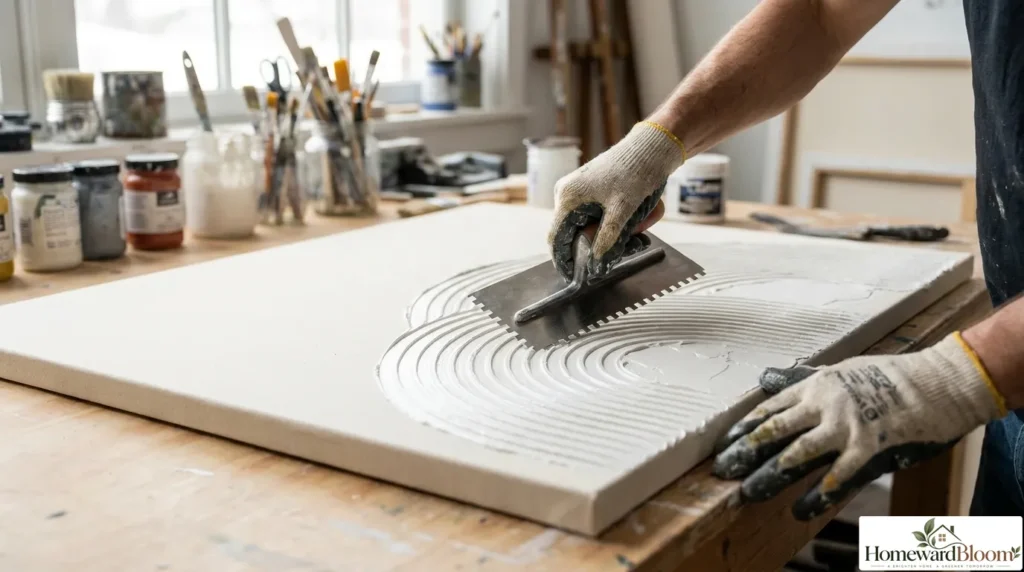
Textured wall art made from plaster or drywall spackle has become a major interior design trend, with retail stores charging hundreds of dollars for large pieces. However, interior designer Erika Conner of Olive & June Home demonstrates that creating your own large-scale textured art is simple, fast, and highly affordable.
Required Materials
- Stretched canvas (new, thrifted, or repurposed old artwork)
- White acrylic paint or primer for basecoating
- Pre-mixed joint compound (drywall compound)
- Putty knife or spackling scraper
- Notched trowels, forks, or comb tools for creating texture
- Clear spray sealant or interior latex/acrylic paint
Step-by-Step Instructions
- Prime the Canvas: Apply a solid basecoat of white acrylic paint or gesso primer across the entire canvas. This creates a moisture barrier that prevents the raw canvas fabric from soaking up water from the wet joint compound.
- Apply Joint Compound: Once the primer dries, use a putty knife to scoop globs of pre-mixed joint compound onto the canvas. Spread a smooth layer approximately 1/8 to 1/4 inch thick. Avoid applying an excessively thick layer, as heavy compound can cause the canvas to sag or crack during drying.
- Sculpt the Pattern: Drag a notched trowel, comb, fork, or your fingers through the wet compound to create geometric arches, organic waves, or straight diagonal ridges.
- Allow Proper Drying: Set the canvas flat in a warm, dry room for 24 to 48 hours.
- Paint and Seal: Leave the piece in raw chalky white, or coat it with interior paint to add subtle taupe, sage green, or matte black tones. Finish with a clear acrylic spray sealant to protect the surface against dust and flaking.
Comparison Table: Joint Compound vs. Traditional Acrylic Modeling Paste
| Feature / Metric | Pre-Mixed Joint Compound | Professional Acrylic Modeling Paste |
|---|---|---|
| Primary Ingredient | Gypsum dust & water-based binder | Acrylic polymer emulsion & marble dust |
| Cost Per Gallon | $10 – $15 (Very Budget-Friendly) | $60 – $90 (High Art-Supply Grade) |
| Flexibility | Rigid when dry; requires primed board/canvas | Highly flexible; resists cracking on canvas |
| Drying Time | 24 to 48 hours depending on thickness | 12 to 24 hours |
| Best Application | Large-scale minimalist arch & line art | Fine detail impasto art & heavy layering |
How Do You Press Botanical Art in Minutes Instead of Weeks?
You can press botanical flowers and leaf stems in under five minutes by pressing them between sheets of absorbent white paper using a dry household clothes iron set to medium-high heat. This rapid heat-drying method preserves vivid colors and natural shapes without waiting 6 to 8 weeks for traditional book pressing.
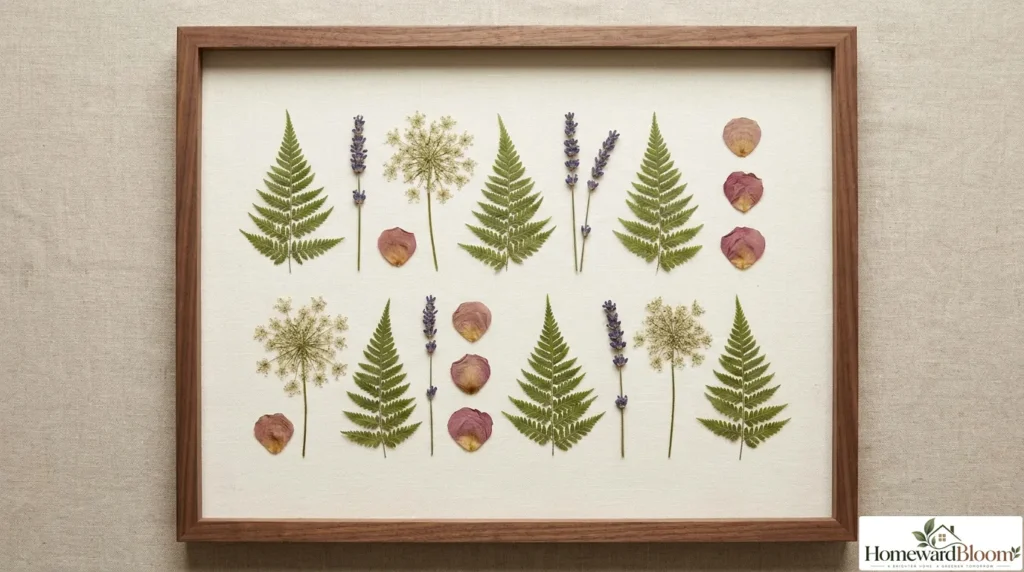
Framed botanical specimens bring timeless organic elegance into home interiors. While luxury decor brands offer framed botanicals starting at $200 to $600, lifestyle designer Julie Blanner explains that Mother Nature provides the artwork for free, allowing you to craft gallery-grade pieces in a single afternoon.
Required Materials
- Fresh plant stems, fern fronds, herbs, or garden flowers
- Household clothes iron (without steam)
- Absorbent plain white paper or parchment paper
- Tweezers and wooden toothpicks
- Craft glue or clear spray adhesive
- Mounting linen, heavy cardstock, or floating glass frames
Step-by-Step Instructions
- Pre-Flatten Thick Stems: For bulky blossoms, place the flower between two sheets of paper inside a heavy book and press down firmly for several seconds to flatten the thick center before ironing.
- Setup Ironing Layer: Lay two sheets of white paper on a hard ironing board or wooden board. Center your botanical stem on the paper and place two additional sheets of paper over the top.
- Apply Heat Without Steam: Set your iron to medium-high heat with the steam setting strictly turned OFF. Press the iron down firmly on a section for a few seconds, then lift and reposition. Do not slide the iron back and forth, as moving it can tear delicate petals or snap stems.
- Transfer and Dry: As moisture extracts, replace wet paper sheets with fresh dry paper and repeat the pressing process until the plant stem is crisp, flat, and completely dry.
- Mount for Framing: Using tweezers, carefully place the dried stem onto mounting paper or textured linen backing. Apply tiny dots of craft glue to the back of the stem with a toothpick to secure it in place, then mount inside a sleek glass frame.
What Painting Techniques Help Beginners Create Gallery-Quality Canvas Art?
Beginners can create gallery-quality acrylic paintings on canvas by adhering to classical painting fundamentals, using a limited color palette to prevent muddy mixtures, and applying a toned ground coat before painting. Building paintings in structured stages of line, value contrast, and glazes ensures professional, harmonious results.
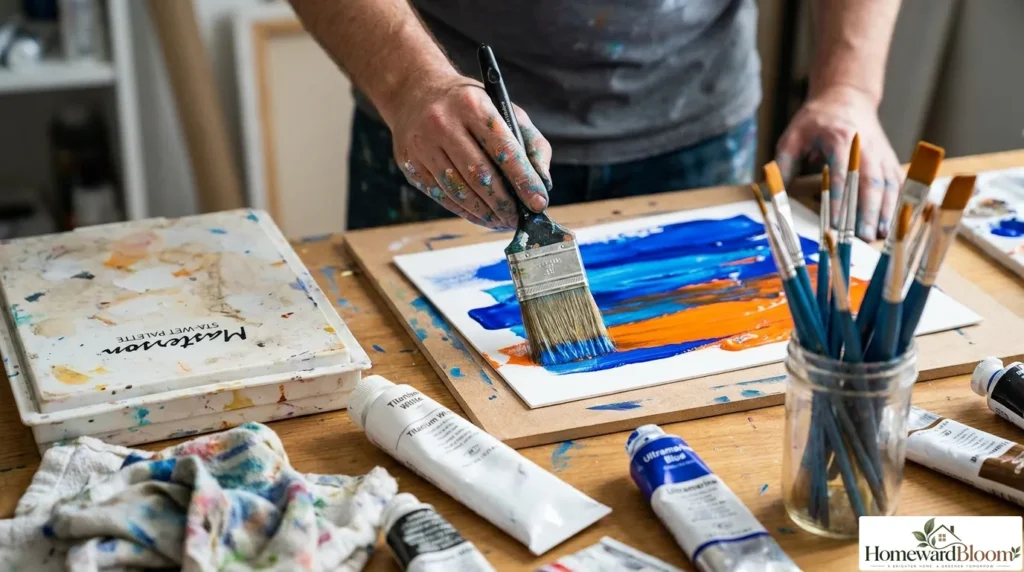
Many aspiring artists feel intimidated by a blank canvas, assuming that producing beautiful art requires innate talent. However, professional artist Will Kemp, founder of the Will Kemp Art School, proves that painting is a learnable skill based on classical Old Master principles adapted for modern acrylic materials. Acrylic paint uses a water-soluble acrylic polymer emulsion binder that dries quickly into a water-resistant layer, making it ideal for building transparent glazes or covering up mistakes without disturbing underlying layers.
According to guidelines documented at the National Gallery, London, understanding classical structure drastically improves artistic outcome. Will Kemp outlines seven essential principles that guarantee painting success regardless of subject matter:
Will Kemp’s 7 Core Painting Principles
- Coloured Ground: Never paint on stark white canvas. Applying a quick warm neutral wash (such as Yellow Ochre or Burnt Umber) provides a mid-tone foundation that unifies colors and makes judging light and shadow effortless.
- Contrast & Value: Value (how light or dark a tone is) accounts for 80% to 90% of a painting’s visual success. Strong contrast between light highlights and deep shadows creates instant depth and form.
- Composition: Organize your subject using classical rules like the Rule of Thirds to guide the viewer’s eye across the canvas harmoniously.
- Colour Mixing & Color Bias: Avoid muddy color mixtures by understanding color bias—pigments carry subtle undertones (e.g., warm reds with orange bias vs. cool reds with violet bias).
- Perspective: Establish clean linear and atmospheric perspective to create believable spatial depth in landscape or architectural scenes.
- Negative Space: Pay attention to the background shapes surrounding your main subject; well-balanced negative space prevents visual clutter.
- Glazing: Apply thin, transparent layers of acrylic paint mixed with medium over dry opaque underpaintings to produce luminous, jewel-like optical color depth.
The 3-Tube Beginner Limited Palette
To master color theory without feeling overwhelmed by dozens of paint tubes, Will Kemp recommends starting with a three-color limited palette:
- Titanium White: High opacity pigment offering exceptional covering power.
- Ultramarine Blue: A rich blue with purple undertones that mixes beautifully with earth tones.
- Burnt Umber: A warm, dark earth tone that, when combined with Ultramarine Blue, produces rich, natural dark tones very close to black without harshness.
| Paint Tube Color | Pigment Role & Characteristics | Color Mixing Advantage |
|---|---|---|
| Titanium White | High opacity white with maximum covering power | Controls value and lightens mixes cleanly without dulling |
| Ultramarine Blue | Transparent, rich cool blue with violet bias | Mixes with Burnt Umber to create deep, natural darks |
| Burnt Umber | Semi-opaque warm earth brown | Unifies warm mid-tones and grounds washes effortlessly |
When working with acrylics, manage paint drying times by using a stay-wet palette (a lidded tray containing wet blotting paper under greaseproof paper) or misting paints periodically with a water spray bottle. For supports, beginners can paint on 300gsm (140lb) heavy-weight acrylic paper, Cold-pressed NOT watercolour paper, or pre-primed canvas boards wrapped over sturdy backing.
5 Fast DIY Wall Art Hacks from Thrifted and Textile Materials
Creative DIY home decor channel Designed to the Nines demonstrates that high-end designer wall art can be recreated using budget components from craft stores and thrift shops. Here are five high-impact, easy DIY projects:
1. Thrift Store Frame Transformation with Rub ‘n Buff
Large picture frames cost small fortunes in retail stores. You can acquire massive frames at local thrift stores for under $40, paint the outer moulding satin black, and apply Rub ‘n Buff gold leaf wax along the inner carved accents to achieve a vintage metallic statement piece.
2. 5-Minute Textile & Fabric Remnant Art
Textile wall art with rich woven textures is a major trend running hundreds of dollars in boutique catalogs. To get the look for under $10, purchase a woven fabric remnant or rug pattern swatch from a craft store. Cut the textile snippet to size, tape it behind a pre-cut picture frame mat, and mount it inside a thrifted glass frame for an instant designer look.
3. 3D Shadow Box Metal Flower Art
To duplicate $100 luxury shadow box art, take an $18 thrifted or clearance shadow box frame. Spray paint an outdoor metal flower sculpture with 18-karat gold metallic spray paint. Mount textured dark slate peel-and-stick wallpaper onto cardboard backing, hot glue the golden metal flower to the center, and assemble inside the shadow box frame.
4. Modern Wood Block Scribble Art
Britnie George of Craft Your Happy Place highlights a modern wood craft that takes 20 minutes and costs less than $2 per block. Chop an 8-inch square from a 1×8 pine board (actual width ~7.5 inches). Paint the outer block black, tape off a 1-inch border with painter’s tape, and seal the tape edge with a layer of Mod Podge to completely eliminate paint bleed. Paint the center artboard neutral off-white, add a bold continuous acrylic scribble gesture, and hang on the wall using heavy-duty Command damage-free strips.
5. Boho Macrame Wall Hanging
According to macrame tutorial channel Interwoven Studio, you can knot a bohemian yarn wall hanging using a 17 to 20-cm wooden dowel rod and 4-millimeter macrame cord cut into nine 200-cm lengths. Attach the cord to the dowel rod using lark’s head knots and weave structured geometric diamonds using double half-hitch knots for a textured fiber art installation.
How to Map and Style a Budget Gallery Wall
To map and style a budget gallery wall successfully, lay out your complete combination of frames on a large paper drop sheet on the floor first, trace around each frame with a pencil, and tape the paper sheet to your wall as a precise template.
Interior styling experts at Bed Threads recommend mixing eclectic frames gathered from second-hand shops with frameless clip displays, vintage book pages, and personal art studies.
| Step | Phase | Action / Instruction | Design Outcome |
|---|---|---|---|
| 1 | Layout Prep | Spread a large paper drop sheet flat on the floor | Creates a 1:1 working canvas of your wall area |
| 2 | Composition | Arrange mixed frames until composition is balanced | Maintains uniform 2 to 3-inch gaps between frames |
| 3 | Tracing | Trace frame outlines and mark hanging nail positions | Accurately maps hardware locations before hanging |
| 4 | Mounting | Tape paper template to wall at 57–60″ center height | Ensures perfect eye-level gallery placement |
| 5 | Execution | Drive picture nails through paper marks and tear paper away | Prevents accidental extra nail holes in drywall |
- Maintain Frame Consistency: When building an eclectic wall, unify disparate artwork styles by keeping frame finishes consistent—such as all natural light oak, all matte black, or all uniform white frames.
- Leave Breathing Room: Space frames 2 to 3 inches apart across the arrangement so individual pieces do not visually crowd each other.
- Mix Textures: Combine flat paper prints with 3D elements like pressed botanicals, wooden block art, and textile swatches for rich visual dimension.
Frequently Asked Questions
The most important rule is getting the scale right by following the two-thirds rule. Artwork should span roughly two-thirds the width of the sofa, bed, or console beneath it. Art that is sized correctly looks intentional and high-end, even if crafted from inexpensive budget supplies.
To prevent joint compound from cracking, prime the raw canvas with acrylic paint or gesso before applying the compound. Keep the joint compound layer between 1/8 and 1/4 inch thick, as overly thick applications hold excess moisture and crack as they dry.
Yes, beginners can paint realistic acrylic art by following classical fundamentals like starting with a warm coloured ground and using a limited color palette. Mixing Ultramarine Blue, Burnt Umber, and Titanium White allows beginners to master value and structure without mixing muddy colors.
An oversized picture frame featuring a wide, exaggerated white mat (mount) makes any affordable print, postcard, or sketch look like designer artwork. The extra margin space gives the image visual breathing room and draws focus directly to the subject.
To stop paint from bleeding under painter’s tape, apply a thin coat of clear Mod Podge over the taped edge before painting your topcoat. The Mod Podge seals microscopic gaps along the tape line, ensuring razor-sharp, perfectly clean paint edges every time.
Wall art should be hung so its center sits 57 to 60 inches off the floor. When positioning art directly over furniture, maintain a gap of 6 to 10 inches between the bottom of the frame and the top edge of the furniture.
Conclusion
Creating high-end DIY wall art that looks expensive comes down to mastering correct scale, applying framing discipline, and transforming simple raw materials with proven artistic principles.
By leveraging budget-friendly techniques—such as sculpting joint compound onto primed canvas, fast-pressing botanical stems with an iron, or painting with Will Kemp’s limited three-color acrylic palette—you can fill your home with personalized, gallery-worthy statement pieces for a tiny fraction of boutique retail prices. Measure your furniture, follow the two-thirds rule, and start crafting your custom art collection today!