
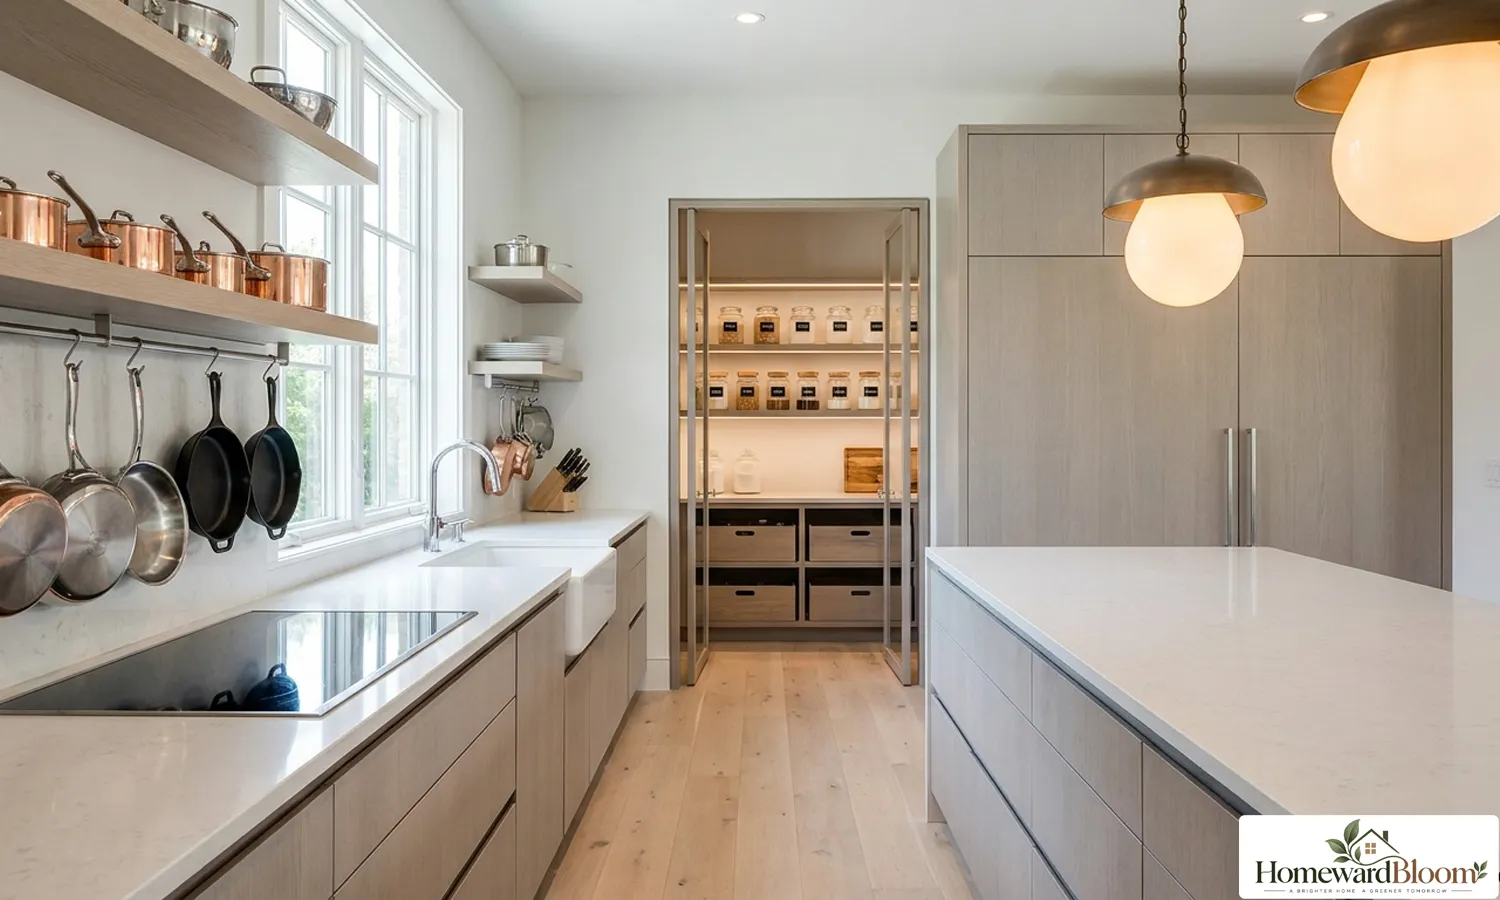
Achieving effective kitchen organization and cookware storage transforms your cooking routine by eliminating daily frustration and recovering wasted cabinet space. Bulky pots, tangled long handles, missing lids, and overcrowded pantry shelves often turn meal preparation into a chaotic chore. By establishing clear functional zones, utilizing drill-free storage tools, and adhering to professional spatial guidelines, you can build an efficient, clutter-free kitchen that stays tidy over time.
| KEY TAKEAWAYS • Declutter Before Organizing: Remove unused cookware, expired food, and broken lids before buying new storage products. • Store Near Activity Zones: Keep pots, pans, and cooking utensils directly in the primary cooking area near the stove. • Utilize Vertical & Drill-Free Tools: Expand storage without damaging rental walls using magnetic shelves, tension rods, and adhesive hooks. • Standardize Pantry Storage: Prevent deep shelf clutter by using uniform, stackable, airtight container sets and pull-out organizers. • Maintain Industry Clearances: Align cabinet and appliance layouts with National Kitchen & Bath Association (NKBA) standards for safe movement. |
Vertical Pan Racks vs. Stacked Storage: Which Is Better?
Vertical pan racks allow you to store cookware upright in dedicated individual slots, whereas stacked storage involves piling pots and pans inside one another. Utilizing vertical slots prevents metal friction and eliminates the need to lift heavy upper pots when retrieving lower pans.
| Feature | Vertical Pan Racks | Stacked Storage |
| Accessibility | High; pull out any pan without lifting others. | Low; requires lifting heavy upper pots. |
| Damage Risk | Low; keeps metal surfaces separated. | High; causes scratching on enamel or non-stick finishes. |
| Space Efficiency | High in tall cabinets or deep drawers. | High in narrow vertical cabinet height. |
| Best Used For | Daily fry pans, saute pans, and lids. | Heavy stockpots with protective soft liners. |
How Should You Declutter a Kitchen Step by Step?
Decluttering a kitchen requires a methodical approach that addresses specific frustration areas rather than trying to tackle the entire room at once. Focusing on pain points allows you to systematically clear cabinets, discard non-functional items, and reintroduce essential cookware in logical order.
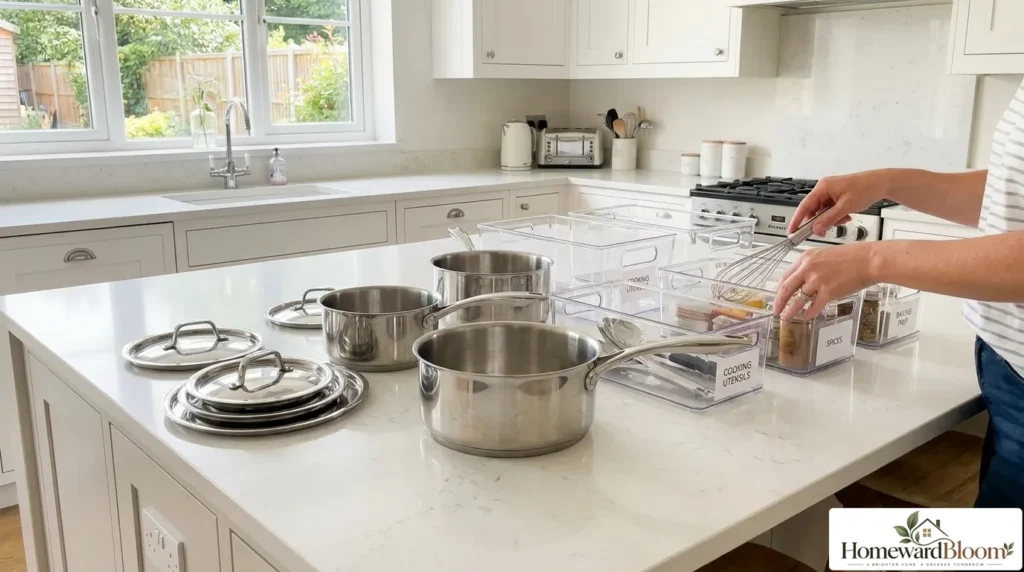
According to home organizing expert Mia Danielle, following a step-by-step pain-point method ensures your counters stay clear while you work:
1. Clean Your Workspace:Begin with empty, clean countertops to establish a clear visual canvas.
2. Identify the Pain Point:Pinpoint the exact cabinet or drawer causing daily frustration, such as an overflowing pan cabinet.
3. Empty the Initial Cabinet:Remove all items from that specific cabinet and place them on the counter.
4. Clean the Cabinet Interior:Vacuum crumbs and wipe down internal shelf surfaces thoroughly.
5. Follow the Trail of Related Cabinets:Move to adjacent or connected cabinets that share similar storage categories.
6. Return Essential Items First:Place your most critical, high-frequency items back into the prime cabinet spots.
7. Rehome Crossover Belongings:Shift secondary items, such as baking dishes, to newly opened spaces.
8. Fully Complete Each Zone:Finalize each cabinet section before moving on to unrelated areas.
9. Form a Discard Box:Gather non-functional pots, chipped lids, and duplicate utensils into a dedicated box for donation or disposal.
10. Tackle Drawers and Spices:Inspect drawer items and discard expired seasoning jars.
11. Perform a Final Surface Wipe:Clean counter surfaces after all items are restored to cabinets.
12. Set Counter Placements:Restructure essential countertop tools to minimize visual clutter.
Similarly, Marie Kondo’s KonMari Method emphasizes organizing by category rather than physical location. Under this approach, you categorize items—such as cookware, books, or miscellaneous goods (komono)—and retain only pieces that serve a purpose or bring value. Discarding unneeded belongings before arranging storage ensures you accurately evaluate your remaining inventory.
How Do You Organize Pots and Pans in a Small Kitchen?
Organizing pots and pans in a small kitchen requires using vertical cabinet organizers, pull-out hardware, and wall-mounted systems to prevent bulky cookware from crowding counter space. Storing cookware directly in the primary cooking zone streamlines meal preparation.
Popular Cabinet and Drawer Systems
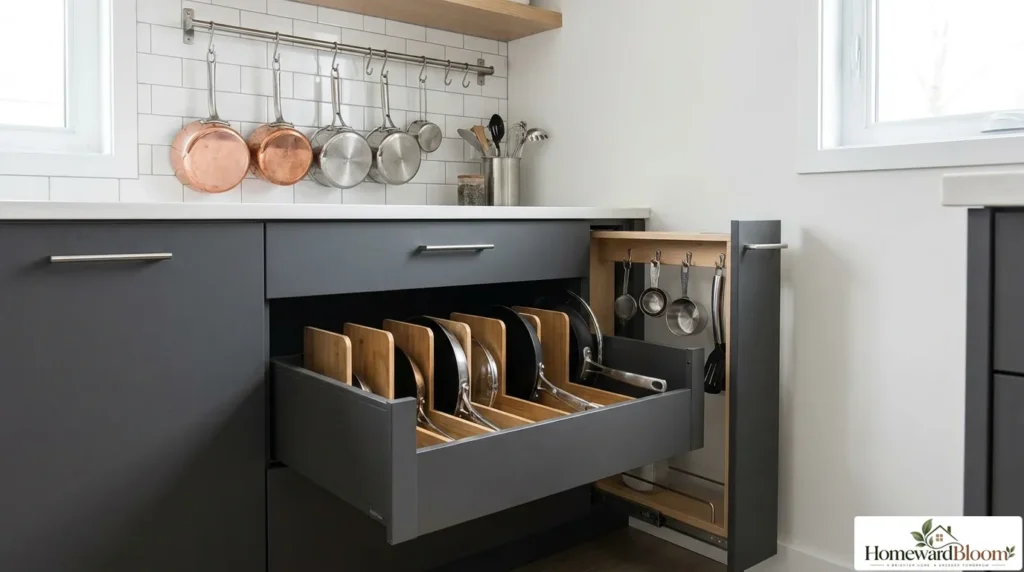
Vertical pot organizers position pans upright so you can retrieve a single pan without lifting heavy stacks. Expandable cookware racks adjust to fit varied cabinet widths, holding pans and cutting boards neatly without cluttering counters. Specialized brand setups, such as the Caraway cookware system, incorporate tailored modular racks alongside over-the-door lid holders for sleek storage.
If your kitchen features deep base drawers near the stove, dedicate them to cookware. Adding customizable pegboard drawer dividers or built-in spacers prevents pots from sliding and shifting during opening.
Built-In Cabinet Hardware Upgrades
Built-in hardware transformations maximize awkward or hard-to-reach cabinet areas:
• Sliding Cabinet Hook Racks: Smoothly slide outward from top cabinet rails to suspend pots and handles vertically.
• Blind Corner Pull-Out Organizers: Bring items out from dark corner cabinets into full view, avoiding manual reaching.
• Rotating Lazy Susans with Hooks: Repurpose corner cabinets or lower shelves to spin cookware into easy access.
• Sliding Floor Wire Racks: Function like sliding drawers on cabinet bases to pull heavy stockpots forward.
• DIY Rod and S-Hook Systems: Mount sturdy metal bars inside tall, shelf-free cabinets to hang frying pans.
Wall-Mounted and Overhead Hanging Ideas
When internal cabinet space is limited, wall systems turn cookware into decor. Mounting a pot rack directly to wall studs creates strong vertical storage. Installing a hanging rail across your backsplash keeps daily pans right above the cooktop. Open wall shelving with undershelf hooks allows you to hang saucepans underneath while storing lids or spice containers on top. For large kitchens, mounting a ceiling rack above an island provides central access, provided fasteners connect securely into ceiling joists.
What Is the Ideal Shelf Depth for a Kitchen Pantry?
According to kitchen design standards, the optimal depth for pantry shelves is 12 to 16 inches. Shelves deeper than 16 inches cause stored items to get pushed to the back, leading to hidden food, forgotten expiration dates, and unnecessary food waste.
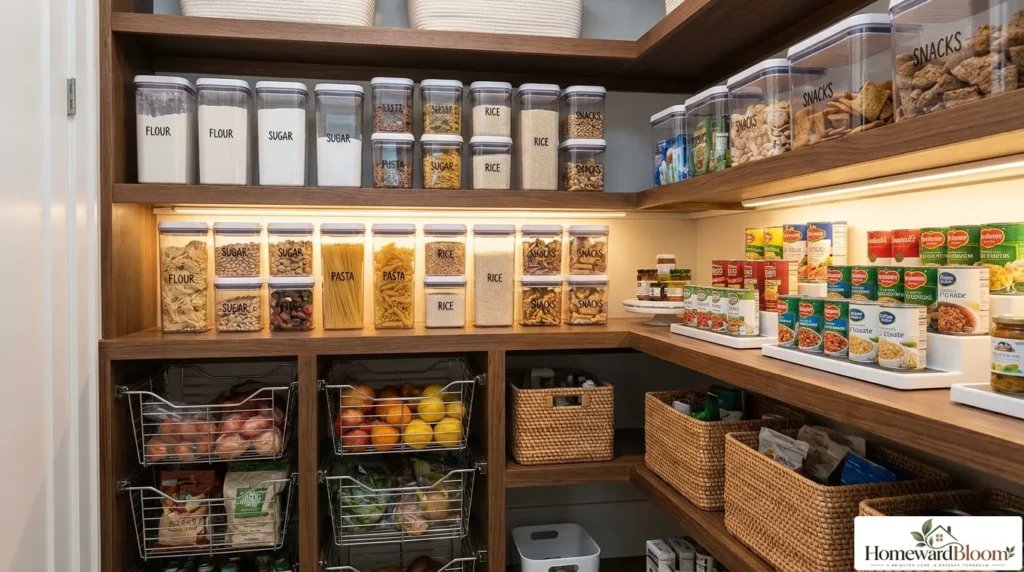
Deep pantry shelves provide raw capacity but frequently create disorganization. Implementing targeted storage tools resolves visibility issues:
| Deep Pantry Challenge | Smart Organizational Solution | Practical Benefit |
| Items lost in the back | Pull-out sliding drawers | Brings items directly into view without manual reaching |
| Forgotten expiration dates | Tiered riser steps & clear bins | Elevates rear items so labels remain visible |
| Corner dead space | Rotating Lazy Susans | Spins canned goods and oils forward effortlessly |
| Mismatched packaging | Standardized airtight container sets | Eliminates visual clutter and locks into neat stacks |
Standardized Food Storage Container Sets
Mixing mismatched plastic tubs creates visual clutter and inefficient cabinet usage. Converting to uniform container sets establishes a structured layout that maintains order.
For small kitchens, nesting container sets like the Joseph Joseph Nest Lock Set fold empty containers into a single block to save space. For dry pantries, airtight container sets like Vtopmart Airtight Containers or Rubbermaid Brilliance keep grains fresh while locking into neat stacks. Using uniform glass meal prep containers, such as Prep Naturals Glass Sets, organizes refrigerator shelves and supports safe food handling guidelines outlined by recognized food safety standards.
Smart Drill-Free Storage Solutions for Renters
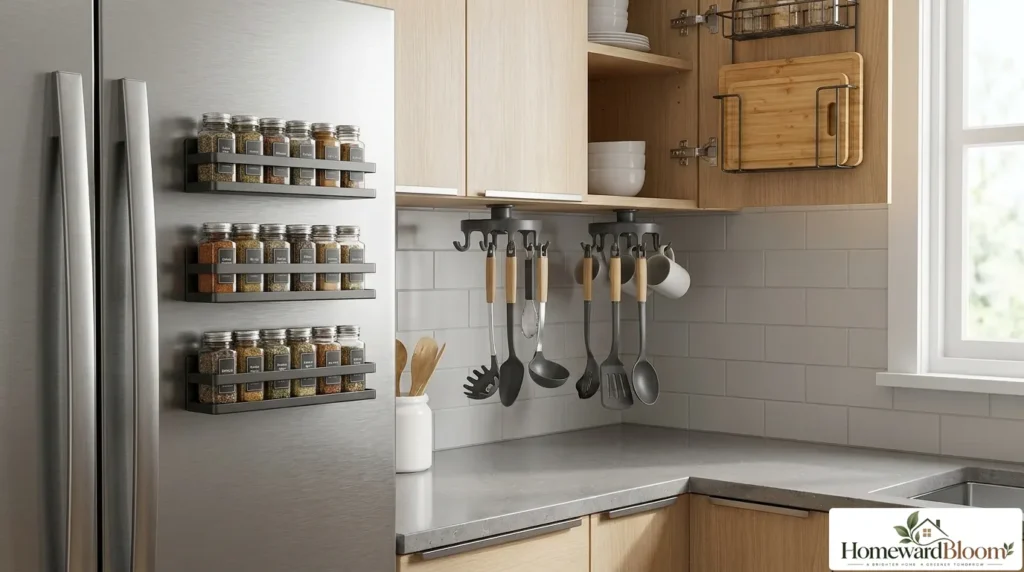
Renter-friendly storage items expand kitchen organization without requiring power tools or leaving wall holes. These solutions utilize strong adhesives, cabinet clamping mechanisms, and magnetic backing.
| Category | Storage Tool Examples | Ideal Placement & Use |
| Magnetic Fixtures | Multi-tier spice racks, heavy staple baskets | Metal sides of refrigerator for seasonings & oils |
| Under-Cabinet Mounts | 6-prong rotating utensil hooks, hanging dry bins | Beneath upper cabinets for spatulas & small jars |
| Appliance Attachments | Magnetic stove top shelf, adhesive cord bundlers | Top of stove control panel & small appliance bodies |
| Cabinet Door Mounts | Over-the-door metal racks & hooks | Lower cabinet doors for cutting boards & pan lids |
• Magnetic Refrigerator Shelves: Multi-tier magnetic spice racks attach directly to metal fridge sides to store seasonings. Larger magnetic baskets hold heavier items like olive oil and flour.
• Under-Cabinet Adhesive Utensil Hooks: Six-prong rotating hooks adhere beneath upper cabinets to suspend spatulas and measuring cups.
• Hanging Under-Shelf Dry Food Bins: Modular slide-on sets clip onto interior cabinet shelves to hold dry grains without tools.
• Over-the-Cabinet Door Organizers: Hanging metal racks hook over lower cabinet doors to hold cutting boards and baking sheets.
• Over-Stove Magnetic Shelves: The magnetic shelf sits directly on top of stove control panels, creating 30 inches of usable space for oils and seasonings.
• Adhesive Appliance Holders: Adhesive clips attach under cabinets to hold stand mixer attachments, while Command cord bundlers manage loose appliance power cords.
Professional NKBA Guidelines for Layout and Clearance
The National Kitchen & Bath Association (NKBA) publishes planning guidelines based on international building codes to ensure safe movement and efficient workflows.
The Work Triangle and Traffic Patterns
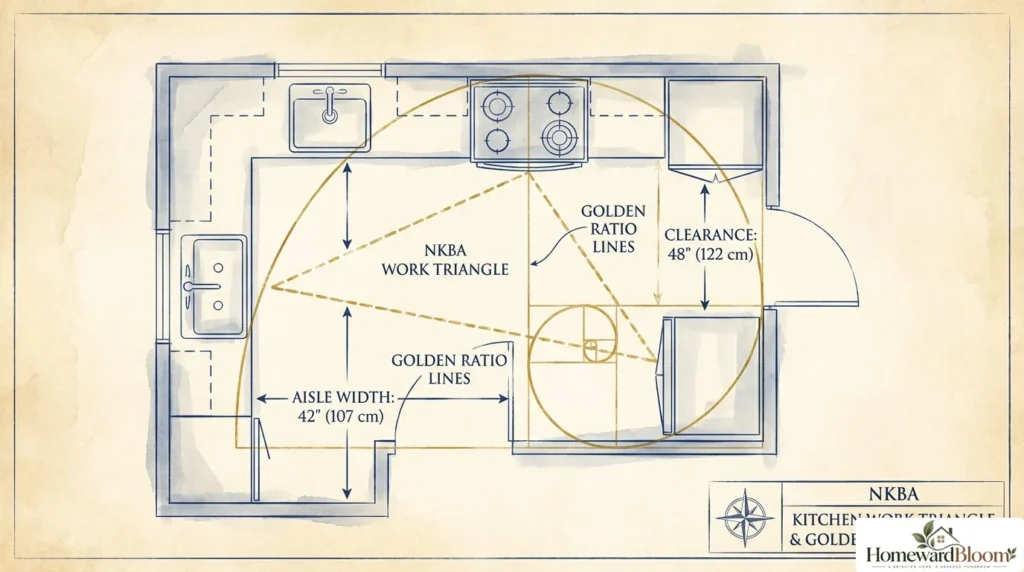
The traditional kitchen work triangle connects the three primary work centers: the cleanup/prep sink, the cooking surface, and the refrigerator. NKBA guidelines mandate specific clearances:
• Triangle Distances: The sum of the three legs should total no more than 26 feet, with no individual leg measuring less than 4 feet or more than 9 feet.
• Obstacle Clearance: No work triangle leg should intersect an island, peninsula, or tall cabinet by more than 12 inches.
• Work Center Separation: Full-height obstacles, such as a tall pantry cabinet or refrigerator, must not block the direct path between primary work centers.
• Traffic Patterns: Primary household walkways must not cross directly through the work triangle.
Work Aisle Widths and Landing Spaces
Proper aisle widths ensure multiple cooks can move safely without collisions:
• Work Aisle Width: A work aisle must measure at least 42 inches wide for a single cook and at least 48 inches wide for multiple cooks.
• Cooking Surface Landing Area: Requires at least 12 inches of continuous counter space on one side of the cooktop and 15 inches on the other.
• Refrigerator Landing Area: Requires a minimum 15-inch landing counter on the handle side of the appliance or directly across from it.
• Sink Preparation Area: Demands a continuous section of countertop at least 36 inches wide by 24 inches deep directly adjacent to the sink.
• Total Countertop Frontage: A comprehensive kitchen design requires at least 158 total inches of 24-inch-deep countertop with clipped or rounded edges for safety.
Standard Storage Frontage Requirements
NKBA guidelines specify total shelf and drawer frontage expectations based on kitchen square footage:
| Kitchen Size | Total Square Footage | Recommended Shelf/Drawer Frontage |
| Small Kitchen | Under 150 sq. ft. | 1,400 inches |
| Medium Kitchen | 151 to 350 sq. ft. | 1,700 inches |
| Large Kitchen | Over 350 sq. ft. | 2,000 inches |
Additionally, at least 400 inches of shelf frontage in small kitchens should sit within 72 inches of the main cleanup sink centerline for efficiency. Frequently used items should remain within an accessible reach range of 15 to 48 inches off the floor.
Creating Functional Kitchen Work Zones
Organizing a kitchen by functional zones prevents cross-kitchen movement during cooking. Research from the Virginia Tech Kitchen Storage Research Project identified 16 primary kitchen storage categories across hundreds of homes. Establishing dedicated centers organizes these categories logically:
1. The Cooking Zone: Located around the stove and oven. Stores pots, pans, skillets, stir spoons, pot holders, and cooking oils.
2. The Preparation Zone: Positioned beside the main cleanup sink. Houses cutting boards, mixing bowls, colanders, measuring cups, and chef knives.
3. The Baking Station: Groups baking sheets, cake pans, rolling pins, flour, sugar, and stand mixers into a single cabinet zone.
4. The Cleaning and Waste Center: Placed beneath the sink. Holds dish soaps, sponges, trash bags, and two separate waste bins for trash and recycling.
5. The Food and Spice Storage Zone: Combines pantry containers, dry canned goods, bread boxes, and spice jars.
6. The Everyday Dish and Glassware Station: Located near the dishwasher for quick unloading. Houses dinner plates, cereal bowls, drinking glasses, and flatware trays.
Applying the First-In, First-Out (FIFO) method across food storage zones ensures older groceries stay in front of newer packages, minimizing food waste.
Frequently Asked Questions
The most space-saving way to store pot lids is mounting them vertically on cabinet doors using adhesive Command hooks or over-the-door metal organizers. You can also file lids vertically inside drawers using expandable metal racks or a DIY cooling rack set inside a shallow bin.
Prevent non-stick cookware scratching by storing pans vertically in divider racks rather than stacking them. If stacking is required due to space limits, place soft felt pan protectors or cloth liners between cookware surfaces to protect delicate coatings.
According to NKBA guidelines, the edge of the primary dishwasher should sit within 36 inches of the nearest edge of the cleanup sink. Additionally, provide at least 21 inches of standing space between the open dishwasher door and adjacent right-angle cabinets.
The first step is clearing off counter surfaces, identifying your biggest functional pain point, and emptying the single cabinet causing the most daily frustration. Discard non-functional items before rehousing essentials.
Organize deep pantry shelves by installing sliding pull-out drawers, adding tiered risers, and using clear stackable bins with labels. Restrict shelf depth to 12–16 inches whenever possible to maintain item visibility.
Conclusion
The most effective strategy for kitchen organization and cookware storage is grouping items into dedicated activity zones near the stove and sink while keeping counters clear with vertical, drill-free organizers.